Step 2: Battery Holder
Before we mount the LCD permanently, we need to put the battery holder into place or we'll have to take the LCD off again to install it. So let's solder that battery holder to BT1.
Tools Needed
- Soldering iron
- Philips-head screw driver
- Wire cutters
Parts Needed
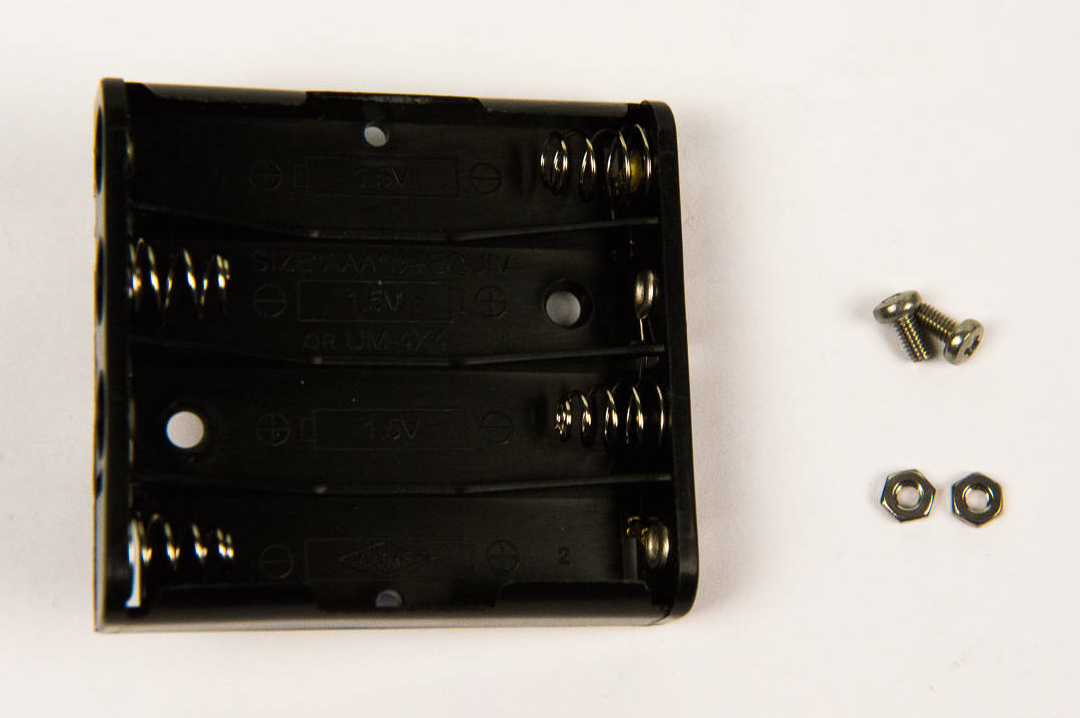
- 1 x 4AAA battery holder
- 2 x Screws
- 2 x Nuts
Instructions
-
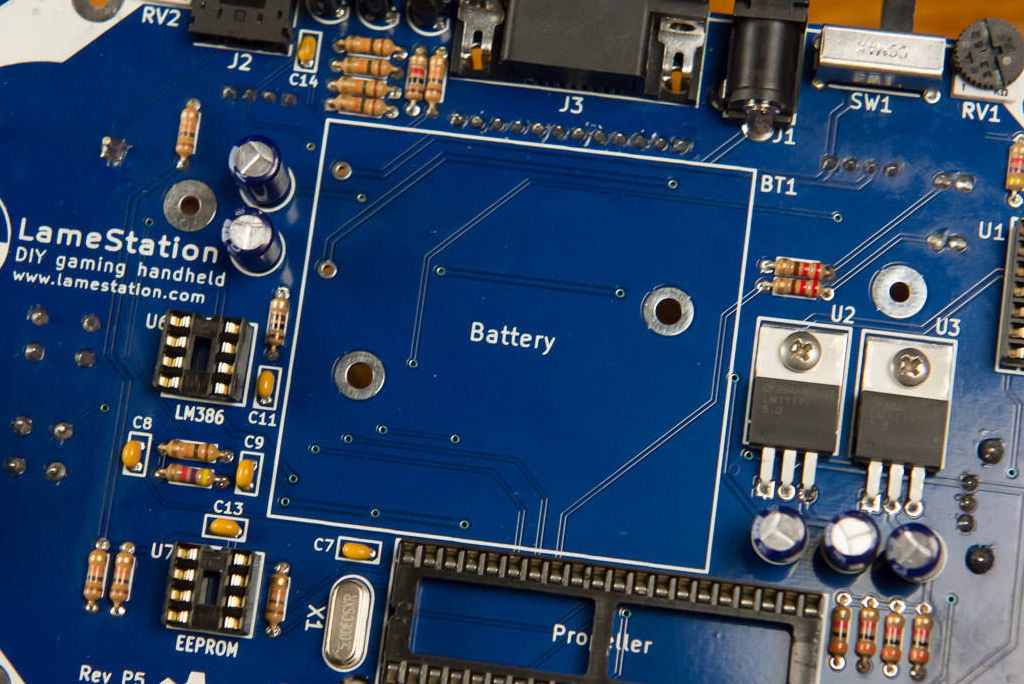
Find the footprint for BT1; it's hard to miss.
-
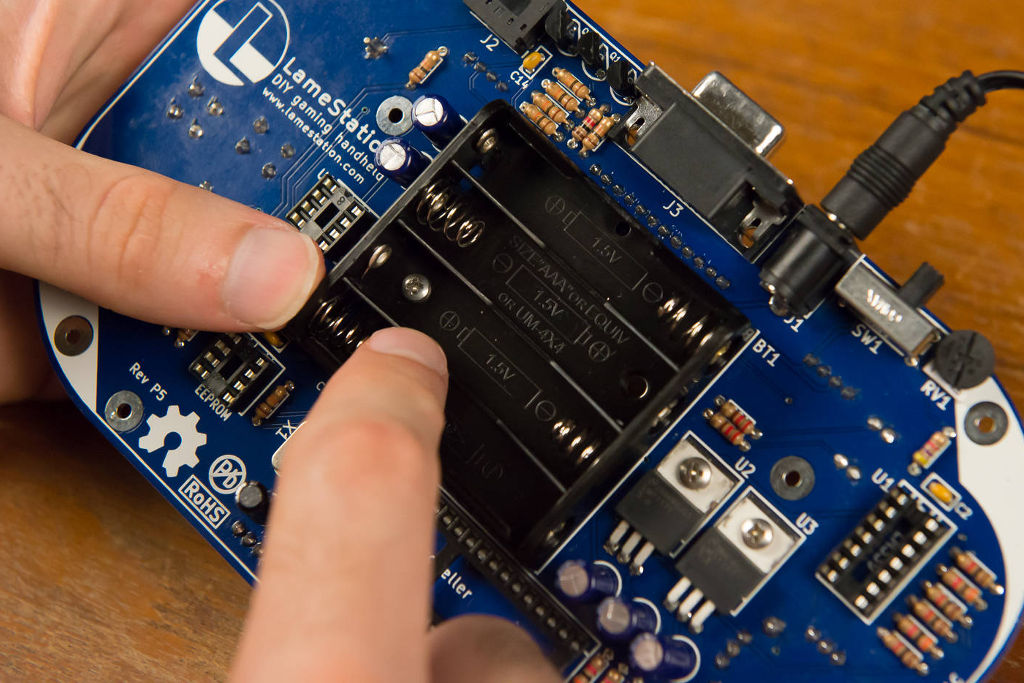
Seat the battery holder into place.

-
Poke a screw through one of the mounting holes in the battery holder and out to the other side.

-
Slide a nut around the screw and tighten it into place.

-
Finish the job by applying pressure to the nut while twisting a screwdriver on the other side.

-
Repeat steps 3-5 for the other screw hole.
-
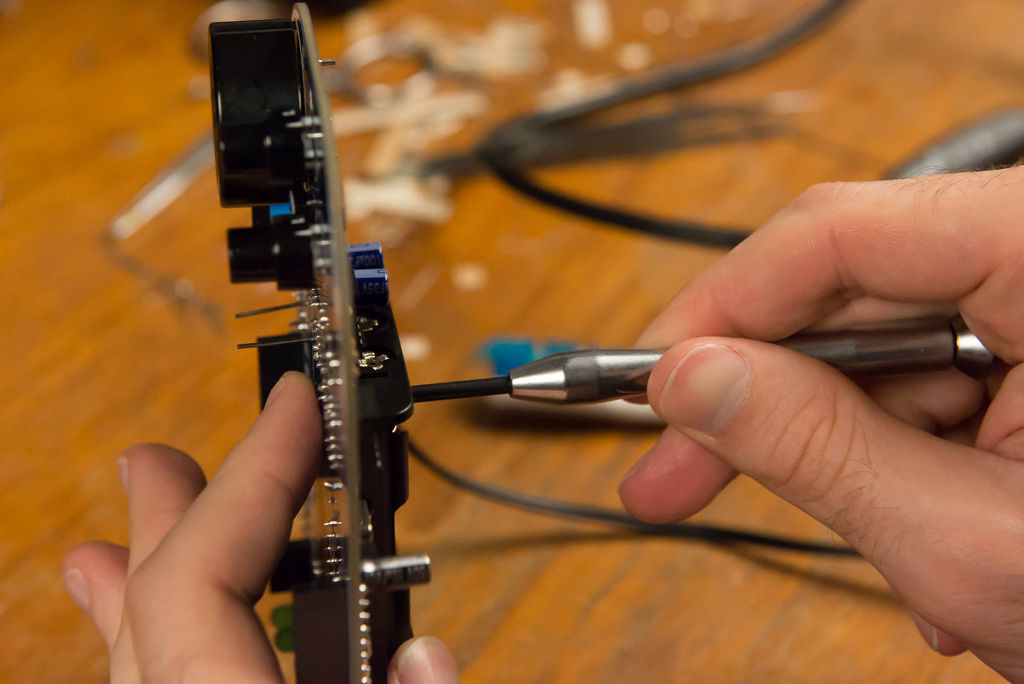
Solder and trim the two battery holder leads.
