Assembly Instructions
These instructions will take you from an empty board to fully assembled LameStation that you built yourself!
What makes a LameStation?
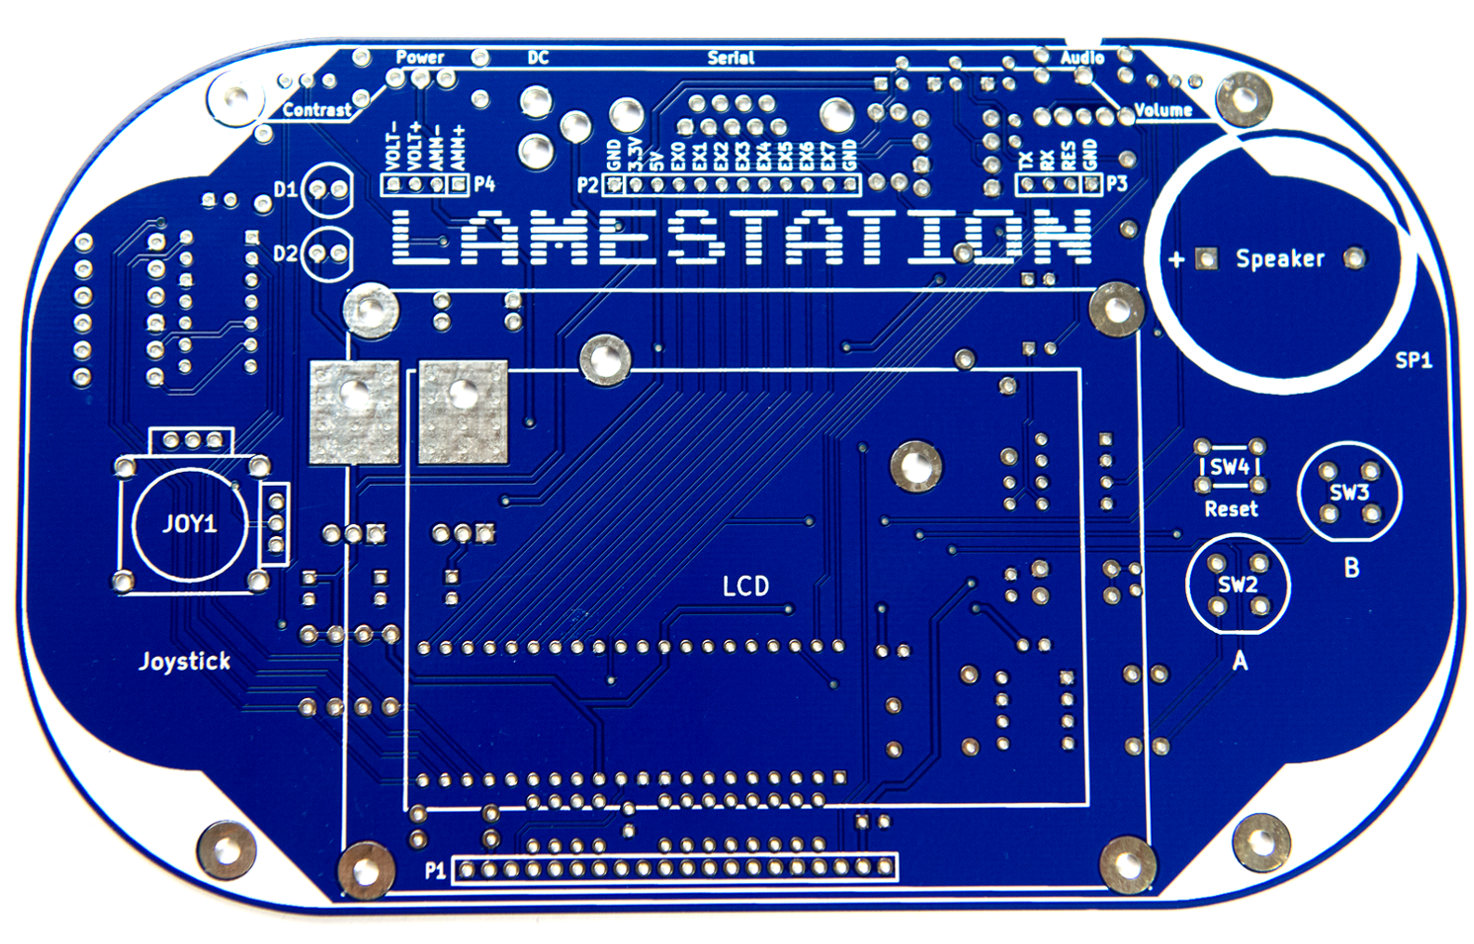
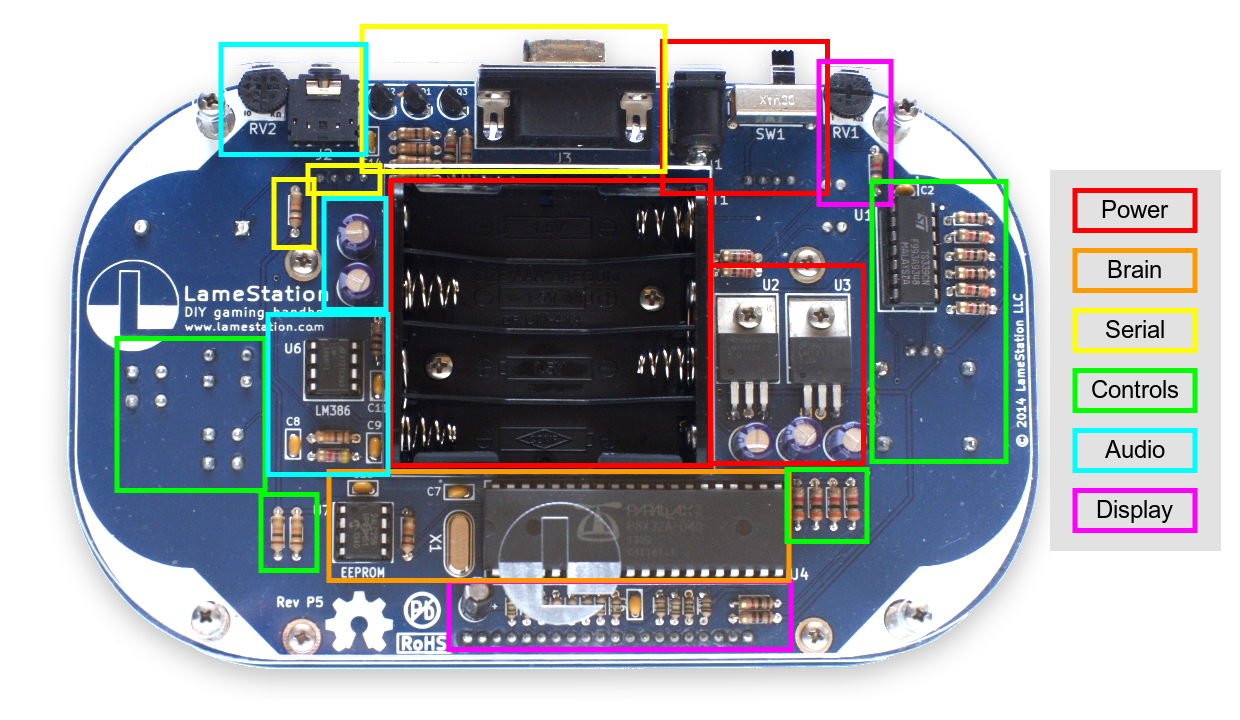
The LameStation can be divided into six systems or parts. These parts are power, brain, serial, audio, control, and display.

How is it organized?
Whenever possible, the board itself is organized by subsystem, with related components grouped together.
How is this manual organized?
This manual works through the six systems of the LameStation, installing different parts as needed in a slow, methodical way that allows you to test your assembly as you build it.
The manual is divided into eight sections. Each Section page talks about how the hardware works conceptually, then contains Step pages that walk through the actual assembly process. Step pages usually require about 45 minutes to complete.
Section 1: Start
Here, we introduce the basics of soldering by adding our very first component to the LameStation, the power jack.
Section 2: Power
In this section, we introduce the basics of electricity by building a power supply for the LameStation, which provides electricity to the rest of the system.
Section 3: Brain
Here, we discover what makes a LameStation tick, by bringing it's microcontroller brain to life.
Section 4: Serial
In this section, we will build a programming interface for the LameStation, so you can actually load new stuff onto it.
Section 5: Control
In this section, we assemble the joystick and button controls, which allow the player to interact with the console.
Section 6: Audio
In this section, you will build a totally awesome amplifier that you can use to pump some sweet LameStation tunes.
Section 7: Display
In this section, you will see the light―or a little over 8000 lights, literally―because you will add the display!
Section 8: Finish
In this section, you will finish off your LameStation by adding the battery holder, cover plate, and any other components still left.